Adding MySQL Connector to the Java Project in Apache NetBeans
Last Updated :
17 Nov, 2023
Adding MySQL Connector Java to the Java Project sometimes creates a fuss for the programmer. In this article, we have provided the steps to install MySQL Connector JAR file using the Connector/J driver and add the MySQL Connector/J to your project.
Note: Before downloading the MySQL connector, you should be clear about the version of the MySQL you are using i.e. whether it is version 5 or 8.
To check which version of MySQL is installed on your computer open the MySQL command line client > write the query show variables like ‘%version%’ This will give you a table containing multiple rows.
Check the version row of the table and confirm your version installed
Prerequisites for the Topic:
- JDK 14 or newer version
- Apache Netbeans IDE
- MySQL Community Server
Steps to add MySQL Connector JAR to Java Project
Step 1: Downloading MySQL JDBC Driver
Step 2: Extract and open the downloaded jar file. The file will be named as mysql-connector-java-8.0.22
Step 3: Open Apache NetBeans IDE > Project > Properties > Libraries > Classpath > Add JAR/Folder > mysql-connector-java-8.0.22 > Click on Open >Uncheck Build Dependency box > Click OK
Implementation
Step 1:
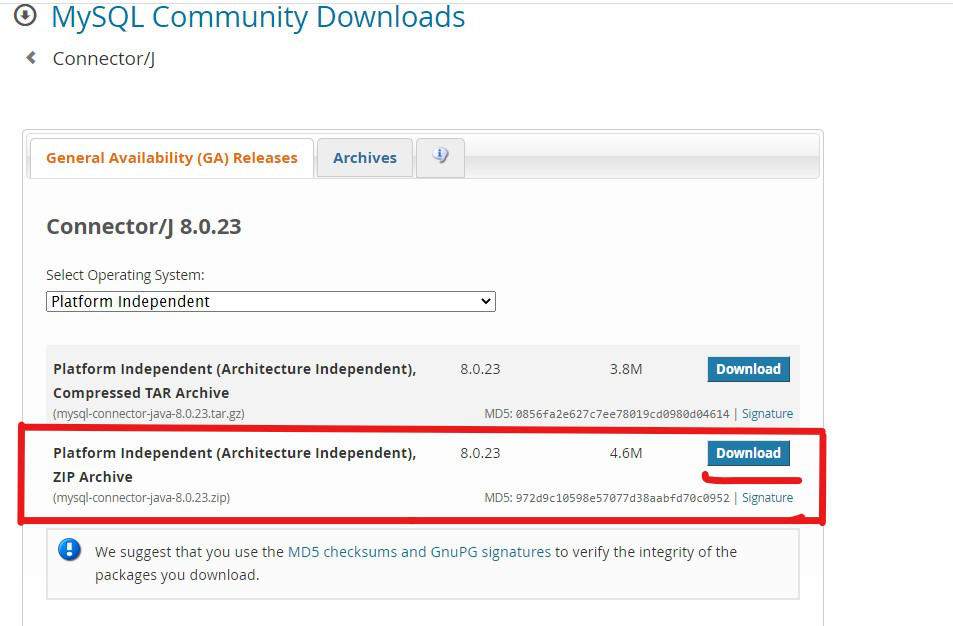
- After ensuring the version, if you have version 8 then just search for MySQL connector version 8 and download it from the official website.
- If the version is 5 then go to the Archived page of MySQL and select the Product version to anyone among all present for version 5.
- Select the operating system to be platform-independent.
- Download the ZIP Archive file which contains the JAR file of the connector.
Step 2: Open the downloaded zipped folder and copy the folder present in it to some other location of your choice.
Step 3:
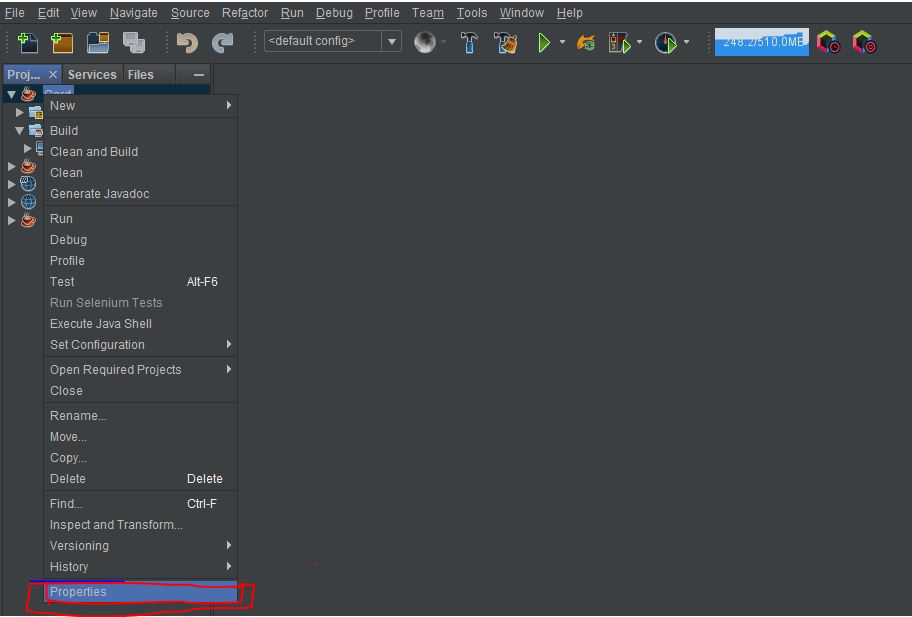
- Open the Apache NetBeans and right click on the project in which you have to add the connector.
- In the option pane, click on Properties.
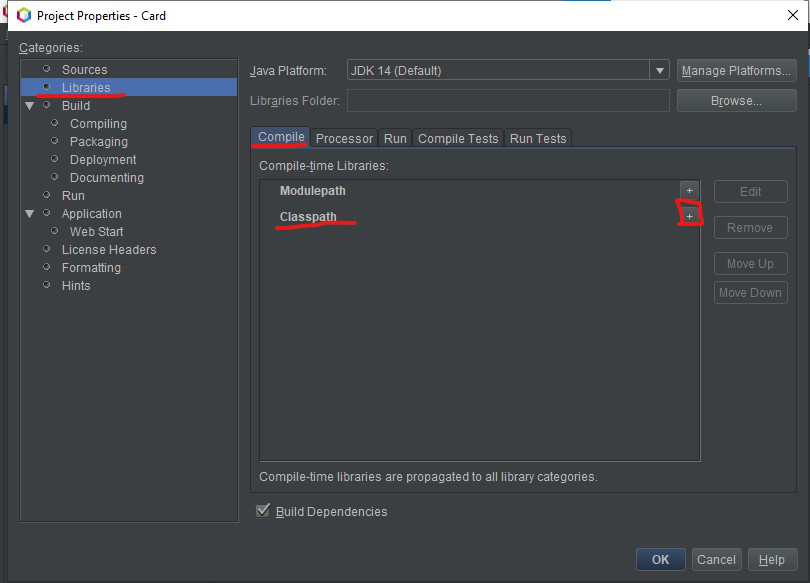
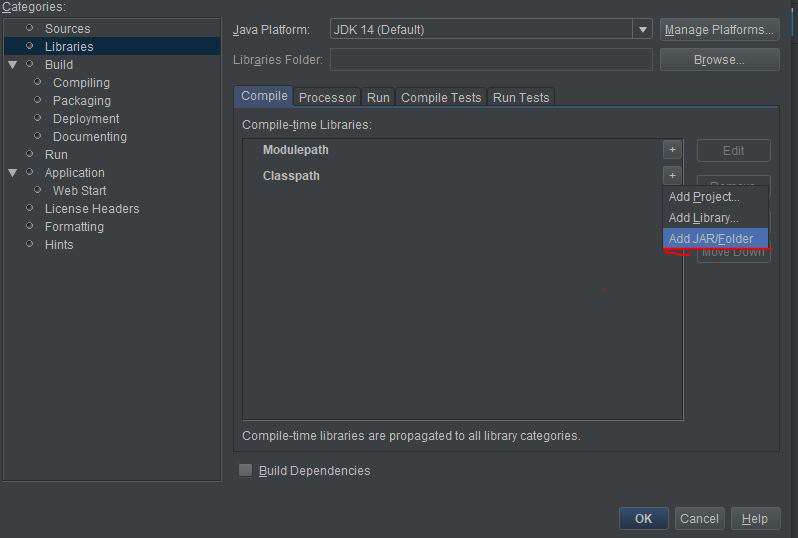
Step 4: In properties, go to Libraries and click on the plus ‘+’ tab of the Classpath and choose Add JAR/Folder.
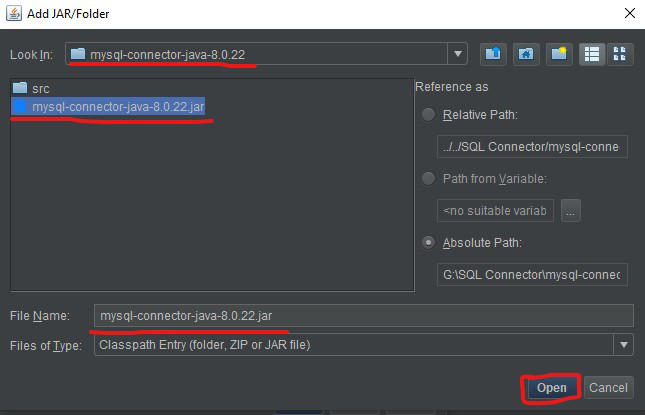
Step 5: Browse the folder which we copied to some other location and choose the JAR file present in that folder with name such as mysql-connector-java-8.0.22 and click on Open.
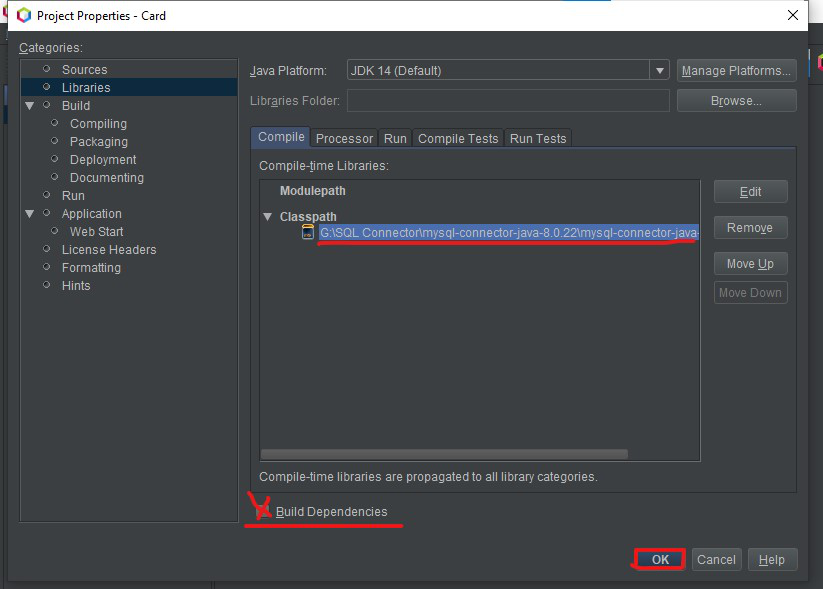
Step 6: Uncheck the box of Build Dependencies and click on Ok.
Step 7: You will note that the MySQL connector is shown in the Libraries package of your project.
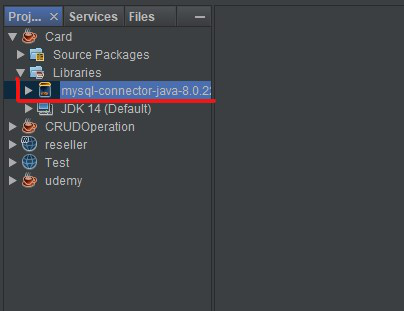
Congratulations, MySQL connector has been successfully installed for your Java project.
Like Article
Suggest improvement
Share your thoughts in the comments
Please Login to comment...